Friday, November 15, 2013

Candy Cane!


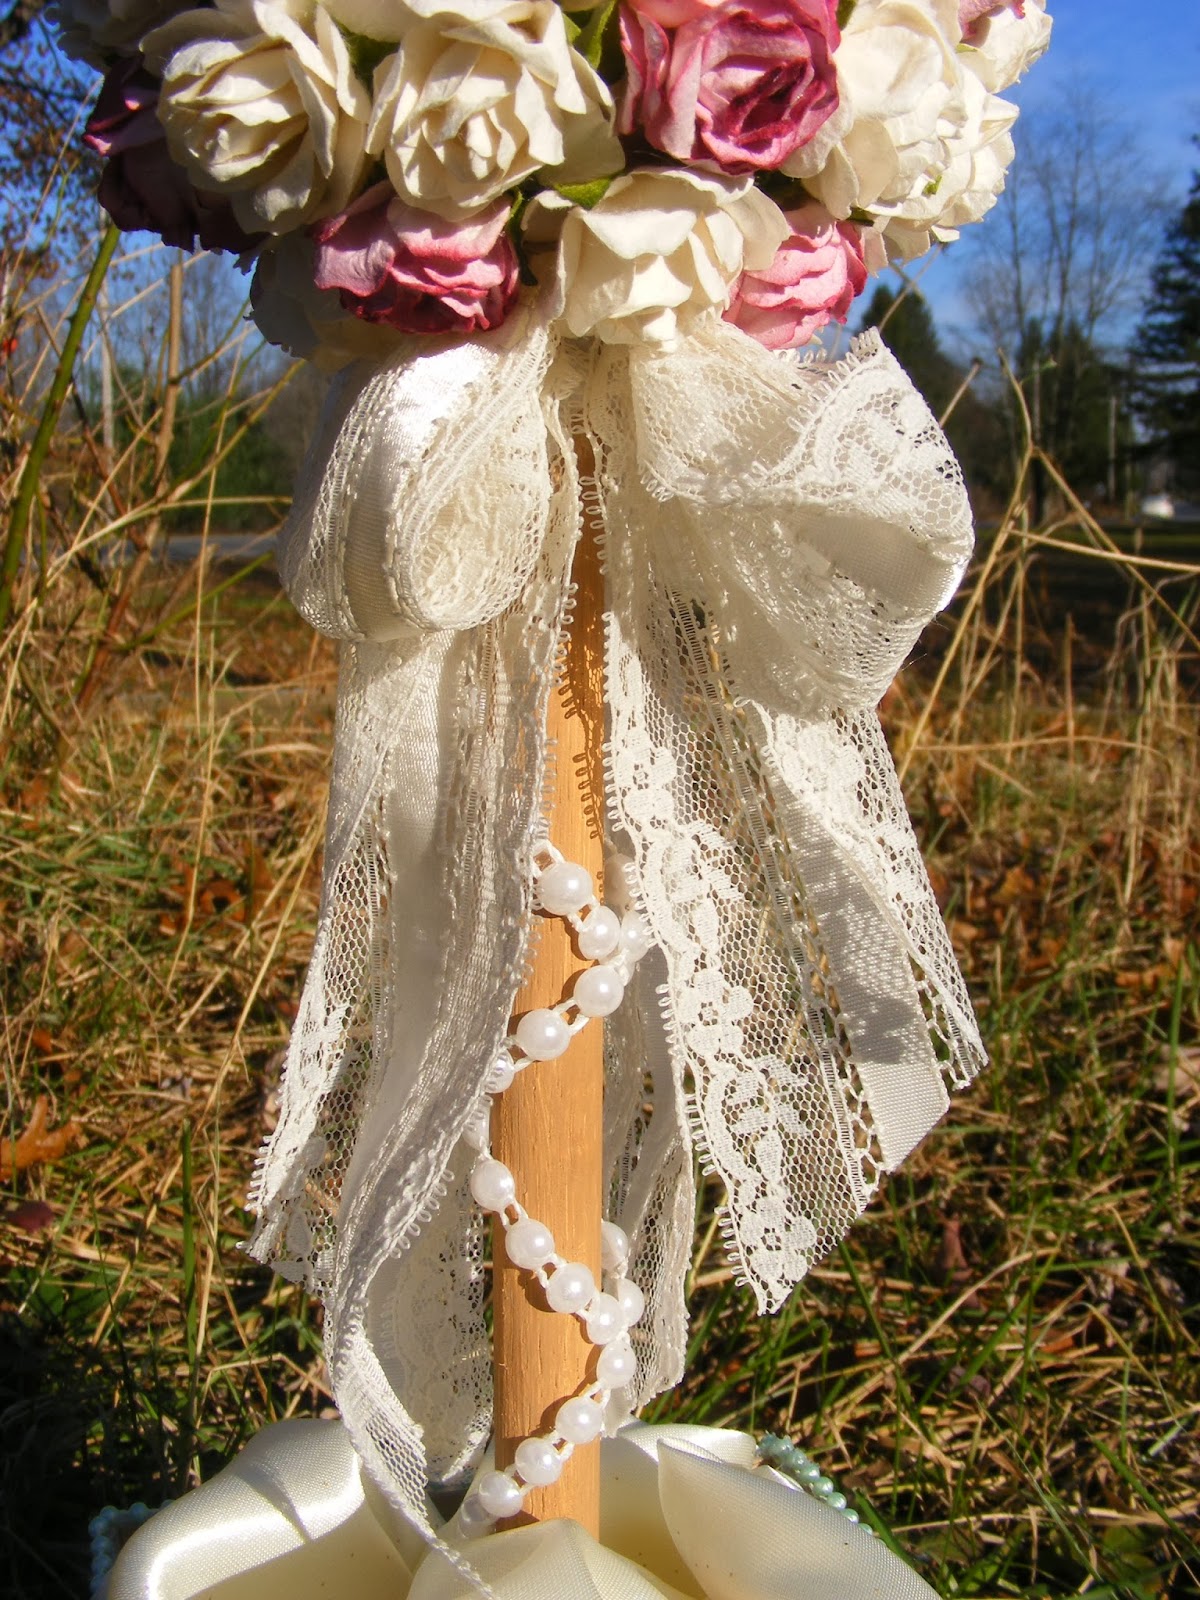
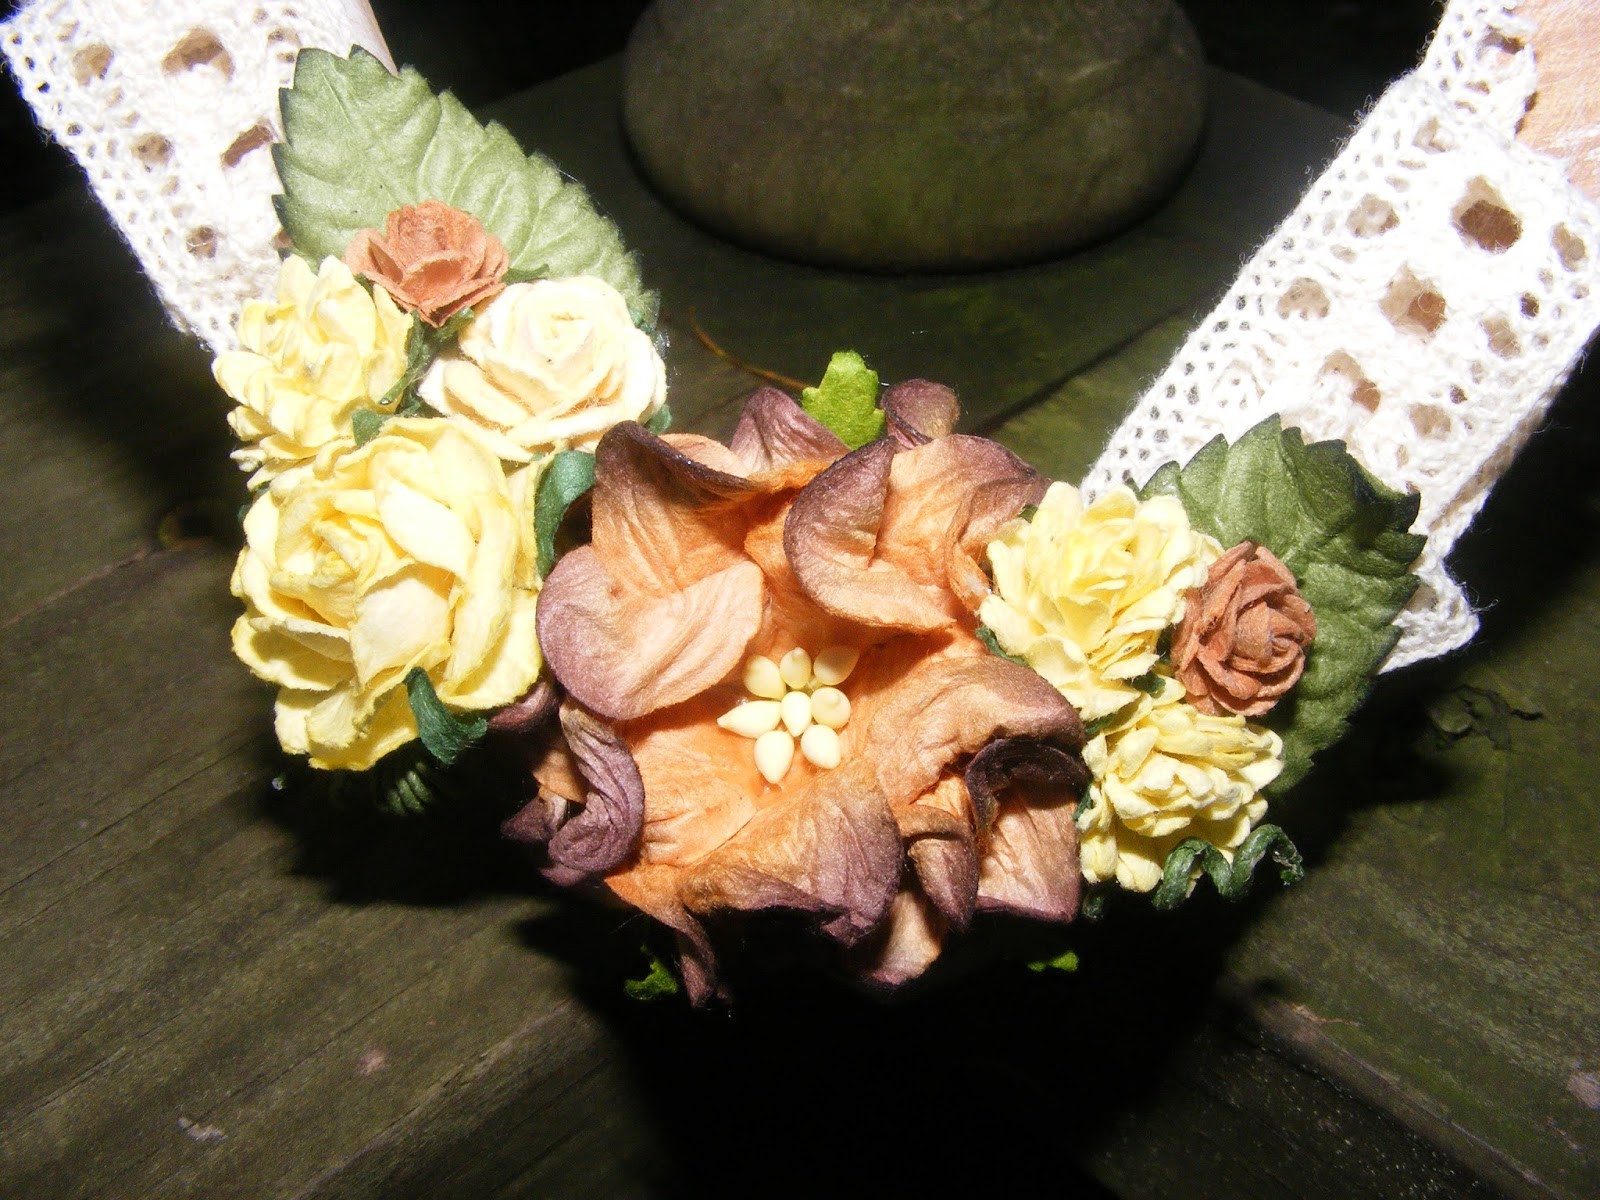
Hello everyone!  here is another project that I created for the SmoothFoam blog hop.  I created this candy cane by using one of the SmoothFoam ornaments.  I used some paper from the Robin's Nest, which is the Red Glitter Stripe.  I then distressed the edges with my distressing tool to give it a tattered look.  I also added some moonstone diamond dew drops to each side of the candy cane.  I then made my own hook to hang it with.  I used some crystal rondell beads and a green pearl.  I made the hook out of wire.  I really like how this came out.  It was so fun and easy to do.

Now please make sure to hop on over to the Chattering Robin's Blog and checkout everyone else's creations using the Robin's Nest and SmoothFoam product and be sure to become a follower of each blog for a chance to win prizes...  Now who doesn't love prizes???  I know I do!!

Thanks for stopping by!
Kim

Smoothfoam Topiary


Hello everyone welcome to the Smoothfoam Blog Hop! 

 Today I have created a topiary using one of the Smoothfoam 2 1/2" Balls.  This was a fun and very easy project to do.

 I started with added several flowers, which I hot glued to the ball.  I then added some lace, which I made into 2 bows.

 I painted the wood dowel that I attached the ball to one end.  I then used some flat back pearls that I twisted around the dowel.

 I then made my own flower pot out of chipboard.  I then decorated the pot with some paper from The Robins Nest.  The paper I used is the Black and White Glitter Pine Tree paper, which I used the other side which is green.  I then used some white cardstock and used a snowflake punch to make a boarder for the top.

 I then added some lace and light green pearls.  I then used the snowflake punch outs to decorate the paper.  This was so fun and easy to do!  I hope you have enjoyed my project for this hop.


Now please make sure to hop on over to the Chattering Robin's Blog and checkout everyone else's creations using the Robin's Nest and SmoothFoam product and be sure to become a follower of each blog for a chance to win prizes...  Now who doesn't love prizes???  I know I do!!

Thanks for stopping by!!
Kim


Tuesday, November 12, 2013

Contest!! Contest!!

Check this out!!  Its an awesome contest over at Creating the Crafty Life!!  There is no cost to you!!
click the link below!!


Sunday, November 3, 2013

Circle Mini

Hello Everyone!  Thanks for stopping in today to check out my DT Project for today.  This project was so fun to make.  I wanted to do something different and I think I managed to do that.  What I have done is a circle mini and put it on a candle stick, that I flipped upside down.  This mini also has pockets and in each pocket is a small tag.  The tags can be used for more pictures or even journaling.  There are eight pages and each page has 3 spots for pictures or journaling.  So let me tell you what I have done.  I took a piece of Red Snowflakes card stock, I used the back for the album, which I made into a meandering album, kinda anyways.

 Instead of making into a book, I turned it into a circle, by bringing the 2 end pieces together and attaching them to make a pocket as well.  I then took another piece of the Red Snowflakes Card stock and made some flower rosettes in different sizes to make a Christmas tree.  I then attached a blue snowflake on the side of the tree.

 The top of the tree I added a bead spacer and a large pearl.  I also punched out some white flowers and added some gold dew drops to the centers.  I then punched out some border strips using the punch from Tonic Studios, which you can find over at Purple Cows website.

The candle stick holder I turned upside down and attached some cheesecloth and then added some pine cone and berry clusters.  I used the stems and curled them up and added them in just the right places.  I love the way this came out and it will be perfect for any center piece during the holiday season.  I hope you have enjoyed my project today, and don't forget that the paper I used is on sale over at The Robins Nest and its 20% off this month.


Thanks for stopping by and Happy Scrapping!!


Kim

Friday, November 1, 2013

Pocket Mini - DT Project for The Robins Nest


Hello Everyone!  Today I will be sharing a Pocket Mini that I created.  These are great for gift giving.  They are small and will fit in just about anything.  This month we have on sale, over at The Robins Nest, some awesome Christmas Papers.  So let me get started on what I have created.  I took a 12 x 12 sheet of Black and White Holly cardstock to form the pocket mini.  I then took a Black Glitter Snowflake, along with a die cut from Gina's Designs.  I also used a punch by Tonic Studios for a border at the bottom, and I placed some white dew drops as embellishments. The punch I used is called the floral strip punch. On the inside of the mini I used some lace from my stash and made some tags for the pockets, which I also used the border punch to decorate the tags.  I didn't do alot of embellishing with this because I wanted it to be able to fold up flat.  To keep the mini closed I used some black ribbon.  I also used black chalk ink to distress some of the edges.  This is a fun and very easy project.  You can do several of these to make as gifts.


I hope you have enjoyed my post today and check back on Sunday for a very different type of mini!!

Thanks so much and Happy Scrapping!!!


Kim

Saturday, October 5, 2013

Check this out!!

Check out what the Robins Nest is doing!!!

They are having A Masquerade Contest!!!


Friday, October 4, 2013

Lace Book

Hi Everyone!!  Welcome to todays DT Project for The Robins Nest.  Today I will be sharing a Lace Book that I have created to hold some of my favorite laces.  This month at the Robins Nest all the papers in the classified Collection are all 20% off.  Below you will find the names of the paper I have used.

I have used the paper line for the pages that hold the lace.  I just love how this came out.  I also used some diamond dew drops at the bottom corner.  The flowers, lace, and pearls are all from my stash.  To keep the book closed I have used some black satin ribbon.  Please check out the Robins Nest store and get these beautiful papers!!!

Papers I have used:
Black and White Glitter Board Swirl
Black and White Clock
Black Fleur Glittered White Cardstock
Damask Black and White Cardstock
Obsidian Diamond Dew Drops

Friday, September 13, 2013

Altered Wood Heart


 Hi Everyone!  This is a little project that I just got done for a color challenge over at CCL(Creating the Crafty Life).  The color pallet we had to use was sunflower hues.

What I have done is an altered heart.  I painted it with gesso first and then added a coat of golden brown acrylic paint.  I then streaked gesso and then wiped it off to give it a softened look.  I then added some cream crocheted lace, which I also used to hang it with.  I then added some flowers which are from WOC(Wild Orchid Crafts).  I think it came out wonderfully.  
Thanks for stopping by and Happy Crafting!!

Sunday, September 8, 2013

"BOO" Continued.....

Hi Everyone!  Here are the last pages of my mini album.  The paper I used for the background is Black Bats Glitter paper.  I cut out some spider webs and some spiders.  The eyes on the spiders are dew drops in orange and purple.  I added some cheesecloth and a few flowers from my stash.  I used some black chalk ink on the cheesecloth and the flowers.


My last page I used Pumpkin Heads Cardstock as my background paper.  I also used dew drops for some eyes on a few of the pumpkin faces.  I used the Pumpkin Glitter Chipboad pieces at the bottom and used a few of the diamond dew drops in black for a face.  I also gessoed the edges of the pumpkins to give them dimension.  I also added some cheesecloth and a flower from my stash.  Each of the pages I used gesso on the edges just to give it some pop.  I bound this album with a large ring and used some lace in blacks and whites from my stash.  I hope you have enjoyed this album.  Thanks for stopping by.

Don't forget that all the Halloween Paper is on sale this month at 20% off over at The Robins Nest Store.

Happy Scrapping!!!
Kim

Friday, September 6, 2013

"BOO" Album - DT Project for the Robins Nest

Hi Everyone!!  Today I am sharing my DT Project for September.  I call it my "BOO" Album.  The front cover was so fun to do.  I used for the letters Boo Words Glitter Cardstock.  I fussy cut the letters and used gesso on the edges and I used pop dots to give dimension to the "B" and the bottom "O".  The back ground paper is Purple Glitter Crackle, which I love!!!  I added some flowers from my stash and tucked cheesecloth that I inked with black chalk ink.  I also gessoed some of the flowers.  The bat at the top are the glitter chipboard bats.  I created the pages out of chipboard.

This page I used another one of the chipboard bats.  The back ground paper I used on this page is the Ghost Camo Glitter Cardstock which I think is so cool!!!  I added more flowers and cheesecloth which I inked as well.

This page I cut out a broken looking fence and used it as a pocket to hold 2 coffin tags.  I used a large bat and tucked cheese cloth behind it and used dew drop gems at the bottom of the bat.  The back ground paper for this on is Purple Bat Glitter Paper.  I hope you have enjoyed the first few pages of this album.  Please stop back to check out the rest of the album.

Also please check out the store for The Robins Nest, all of these papers I used are on sale this month, they are 20% off.  Thanks for stopping by!!  Happy Scrapping!!

Monday, September 2, 2013

DT Project for CCL!!

Hi Everyone!!  Welcome!!  Today I am sharing my first DT(design team) project for CCL(Creating the Crafty Life).  This month its all about sewing.  Any type of sewing.  So I created this mini altered canvas.  I used Graphic 45's Ladies Diary paper.  I layered and distressed the edges.  The image I popped up on dimensional's.  I then added some flat back pearl trim to the edge.  I also layered some lace along the edges.  I added some WOC(Wild Orchid Craft) flowers and a wood bird.
My item of sewing is the crocheted flower at the bottom.  I crocheted 3 flowers and then layered them together to give it some dimension and then added a metal flower and flat back pearl to the center.  I then added a Tim Hotlz ticket and some chipboard letters.  The letters I used some Tim Holtz distress ink in Victorian Velvet and then I used Glossy accents on them.
 Then to soften the project up I used gesso on several spots.  I love how my first project came out and I hope you like it as well.  I am so excited to be on this team for the next 3 months!!!  Thank you so much Misty!!  Please stop back and have a scrapping good day!!

Monday, August 26, 2013

Altered Matchbox Dresser

Hello Everyone! I wanted to share this altered matchbox dresser that I have done for a swap over at CCL(Creating the Crafty Life).  I love how this has turned out.  I will be doing more of these I think.  It was so fun and easy to do.  I created my own matchboxes, why go spend money when I have cardstock right here that will work great for them.  They are the smaller boxes.

 The top of the dresser I created this back for it using a piece of light weight chipboard.  I cut it into 2 pieces and rounded the corners with my corner chopper.  I then glued them together to form the back.  My embellishments are flowers from WOC(Wild Orchid Crafts) and some pearl bling from W2S(Want to Scrap).  The wood pieces I got from a swap over at NBC(Nothing but Crafts), thanks Kim they worked so well for this.  I also received the cameo form her as well.

 The feet for the bottom I created from pearl beads and bead caps.  I love how they came out.  The last picture show that the drawers actually work.  I used very small beads as the handles.  I added more pearl bling to each side of the dresser.  The paper line I used was from Graphic 45, love them!!!  And finally I used my favorite(for right now lol) medium, gesso to give it that something extra!!  I hope you have enjoyed my post today, and please stop back again!  Happy Scrapping!!

Announcement!!!!

Hello to All!!  I almost forgot to blog that I will be a guest designer for Creating the Crafty Life!!!  I am so excited!!  It will be for only 3 months but it will be loads of fun!!  I hope you will all come visit my blog and come visit us over at Creating the Crafty Life!!  This group has some wonderfully talented and oh so wonderfully nice ladies in it.  So come join!!

Monday, August 12, 2013

Altered Clothespin

This is a clothespin that I got from AC Moore, that I altered.  I had alot of fun doing this one.  I used Graphic 45 Le Romantique Paper, I also used some bling from Want 2 Scrap, it was a pearl flourish that I cut apart.

 Here I used flowers from Wild Orchid Crafts.  I layed a Gardenia and some open roses, and then tucked some rose buds in.  I also placed a few pearls amongst the flowers.  I also added a Tim Holtz ticket, which I curled the corners and used some gesso along the edge.
 Here a used a metal embellishment from Butter Bee Scraps, and I gessoed the edge of it and placed an open rose in the center.  The paper I curled the corner and placed a flat back pearl.
 This is the back of it and all I did was curl the edges of the top and bottom corner and put flat back pearls.  I also used gesso along the edge of the paper.

Monday, August 5, 2013

Altered Bucket

Hi Everyone!!  So today I am sharing a small altered bucket that I have done.  This was so quick and easy to make.  It came out just the way I wanted it to as well!!!  The paper I used came from Bo Bunny the Gabrielle line.  I just love pink and brown together!!  The layered some white lace, pink flat back pearls and a brown rosette trim with pearls in some of the rosettes.  I then distressed them with gesso.

 The paper I cut and distressed the edges with my Tim Holtz distressing tool and then also added gesso to the edges.  On three sides of the bucket I did something new.  I used a word stencil and some modeling paste, I think it came out awesome for my first time.

 On two sides I did flower clusters, which are from Wild Orchid Crafts.  I used the pink cottage roses, the 2 tone chocolate brown wild roses,  white tea roses, and pink semi-open roses.  The white daisy under the cottage rose came from a trim that I had in my stash that I cut apart.  I also added green rose leaves under the clusters.  I then softened everything up with gesso.

Thanks for stopping by and have a scrappy day!!


Sunday, August 4, 2013

Brides Book


Hello Everyone!!  Here is todays project!!  I have made a coordinating Bride's mini book to go with the signature book.  This mini is made with 4 chipboard pages, which I used the Tim Holtz Ornamental die again for.  The paper I used is the Gold Glitter Swirl on cream.  This paper is so elegant that I didn't want to over power it with alot.  So what I did was do a flower cluster in the bottom corner, and I added a large piece of bling and a white dove.  I then added some burgandy pearl spray.  I also added a Tim Holtz ticket.  I inked everything in Vintage Photo.  I bound the mini with some white lace at the top.  The inside is very basic so that the bride can add pictures or momentos from the big day.  I hope you have enjoyed my project for this month.  Don't forget this paper is on sale at the Robins Nest website.  Thanks for stopping by and have a scrappy good day!!

Friday, August 2, 2013

Mini Signature Book

Hello Ladies so sorry for the late post.  But here is my DT Project for today.  I have made a mini signature book that can be used for Bridal showers, baby showers or even a Wedding.


 The paper I used is the Red Glitter Swirl Cardstockthis is beautiful paper.  This cardstock is on sale this month at 20% off!!!


 For the covers I have used the Ornamental Die from Tim Holtz and I have also cut all the paper, which is cream colored cardstock for the pages inside.  The cover also has one of Gina's Design doilies which is under a metal flower piece.


 I have also used some lace from my stash, and a flower and leaf, and to top it off I used some cream colored bling.  To bind it I used some chain.  I hope you like what I have created for you.


Please check out my blog at Kreations by Kimber soon to view a tutorial on this project!!

Sunday, July 7, 2013

Pink and Black Part 2!!

Hello everyone!!  Today is part 2 of my Pink and Black Mini!  I hope you enjoyed the first part.  Don't forget to check out The Robin's Nest Store for these great products and also check out Gina's Designs as well!!  I had alot of fun making this mini and using these amazing items.  So lets get started!!

The first page I am showing is very pretty!!  I used another one of the doilies from Gina's Desings.  I inked the edges with black chalk ink.  The paper is the Pink Zebra Glitter Paper.
 I also used one of the butterflies from Gina's Designs as well.
 I used gesso to soften it and added some black flat back pearls to form the body.  I added some flowers from my stash, which I also used gesso on.  The edge of the pocket I used some lace, black trim, and some white flat back pearls which I also used gesso on.

The next page I made a pocket and embossed the black cardstock.  I used gesso to make the design pop.  I added a bunch of flowers and also added a dragonfly from Gina's Designs.
 At the top of the pocket I used some pink cardstock that I punch with a boarder punch and added some frosted white dew drops to each of the scallops.  I used gesso on the flowers and they dragonfly.

The tag for the pocket I also added the frosted white dew drops and gesso all around the edge.  I also used the same boarder punch for the tag.  The background paper is the black paws.


My next page I used the Black Zebra Glitter cardstock for the background and took one of the doilies and cut it in half to make a jounaling spot.  The photo mat I used my Tim Holtz distressing tool and inked it with black chalk ink.
 I added another butterfly from Gina's Designs and some flowers from my stash.  I used gesso again to soften everything.


This next page was fun to make.  Its kinda like a photo wallet.  I used the pink leopard glitter cardstock for the base and used the black zebra glitter cardstock for the wallet.

I used a couple white decorative buttons from my stash for the closer along with some pink twine from Bella Creationz

 I took the other half of the doily and cut it in half again and used another butterfly for the corner, I used gesso on it also along the edge of the wallet.

 I added some flat back pearls to the edge of the pocket.

 The back page of the album just has the pink zebra paper and one of the doilies.  Which I used as a journaling spot.

I hope you enjoyed the second half of this album.  I know I enjoyed making it!!  Again this was my first project for the Robins Nest DT and can't wait to do the next one!!  Please check out their "Chattering Robins" and also check out Gina's Desings.  Thanks so much for stopping by and please come back again!!  Have a happy scrapping day!!!


blog