Saturday, April 25, 2015

Shabby Chic Embellishments

Hello everyone!  This week I have created shabby chic embellishments!  These are so fun and so easy to make. I am so addicted to making these cute embellies!!!  So let me tell you what I have done!


I have used the Button Shape Set to make these super cute button embellishments.  I have used paper that I had in my stash.  I glued the buttons to the paper then cut around the buttons.  I inked them with Victorian Velvet distress ink.  I then added trims and flowers to them.
The next embellishments I used the Dangles collection.  I also used a few pieces from Miniatures Ladies Choice to decorate them, along with flowers, trims, seam binding and pearls.  I also used a heart from Border Sticks Lattice Hearts.   The butterfly and mason jar where created with punches.  I punched out 4 of each and glued them together to stiffen them up.  I then added pattern paper and then decorated them.


 Thanks for stopping and check back soon for more projects!!
Kim :)


Gina's Designs Products used:

Other items used:
Flowers
Lace
Trim
Pearls
Paper from Kittys Scrap Post
Seam Binding
Victorian Velvet Distress Ink

Saturday, April 18, 2015

Brush Caddy

I everyone and welcome to this weeks project!

I have altered this Brush Caddy!

This was so easy to put together and so fun to decorate.  So let's get started! 


The picture above shows the front of the caddy.  I used Graphic 45 paper to cover it.  I added laces and trim from my stash.  I also added beautiful flowers from Wild Orchid Crafts.  I used several collections from Gina's store.  The top left corner I used a small dress form, a heart piece and a leaf flourish.  I painted them all with gesso and then I inked the heart with Victorian Velvet distress ink.  I then inked the leaf flourish with Forest Moss distress ink.  I then inked all the edges with Black Soot.  And then added some small open roses in pale pink.  The top right corner has a large trellis rose, a smaller black open rose and a cream hip rosebud.  I also added another leaf flourish.
The front left bottom I added a frame and a butterfly that I painted and inked and then  added the word "Inspire".  The bottom front right has a larger dress form that I painted, inked and added pattern paper to along with some flat back white pearls.  I then added several different flowers along with another leaf flourish.  I gessoed everything to soften it just a bit.


The photo above is the back of the caddy.  You can see where I added the Lace boarder strip to the bottom.  I inked this with Black soot and used gesso to make it stand out.  The next photos are closeups of the larger dress form.


The bottom photo you can see where I added the flat back pearls to the top and to the fringe on the dress form. Also a closeup of the small dress form with heart.


I hope you like what I have done!  Below is a list of what I used.

Gina's Designs used:

Other items used:
Gesso
Distress Inks: Victorian Velvet, Black Soot, Forest Moss
Flowers: Wild Orchid Crafts
Graphic 45 Paper: Le Romanique
Lace/Trim

Thanks for stopping!!
Kim :)

Saturday, April 11, 2015

Spring Garden Wall Hanging

Hello Everyone! Today's project is 2 small wall hangings that I call "Spring Garden".
I have done alot of different techniques for this project.
So lets get started!


I started with a sizzix die, the Fence.  I cut out 6 of them and glued 3 together to get one fence.  I made 2 of them.  I then painted them with brown paint, added crackle medium and then painted them with ivory acrylic paint.  I then inked them with Vintage Photo distress ink.  I added twine for the hangers.  The chipboard pieces I used came from the Spring Shape Set.


Here is a closer look at the wall hangings in the pictures above.  I used several of the shapes for the Spring Shape Set.  I used the word Spring, the 2 buckets(small and large), a shovel and hand rake, a boot, the watering jug, several butterflies, birdhouse w/bird and 2 of the flowers on stems.  I painted the buckets with gesso, then added crackle medium and then painted them brown.  I added twine to the buckets.  I painted the flower stems with ivory paint for the flowers and sage green for the stems.  I inked them with Victorian Velvet and Forest Moss distress inks.  I then added glossy accents to the flower heads.  I did the same to the butterflies that I did to the tulips.  I used some letter blocks from my stash to spell out "Garden".

Here is a close up of the word "Spring".  What I did is painted the word with ivory acrylic paint, then I used my homemade glimmer mist to color it.  I used Aged Mahogany distress ink to create the glimmer mist.  I then inked it with Victorian Velvet distress ink and then used glossy accents.


Here is a close up of the watering can and the shovel.  I painted them both with grey paint adding crackle medium to the can.  I also created dirt, by using snow-tex and brown paint.  I added that to the bottom of the can, on the shovel, on the buckets and on a few of the slates of the fences.

Here is a close up of one of the buckets, with the flower stem and butterfly.
Below are close ups of the double butterfly, the boot and hand rake, and the butterfly on the large bucket.

Gina's Designs Items used:

Other items used:
Acrylic Paint: Ivory, Sage Green, Brown, Grey
Glossy Accents
Crackle Medium
Letter Blocks
Distress Inks: Victorian Velvet, Vintage Photo, Forest Moss
Snow-Tex
Twine


I hope you have enjoyed this weeks project.  If you would like to see more pictures and a video please go to my blog, Kreations by Kimber.
Thanks so much and have a great day!!


Saturday, April 4, 2015

Easter Card and Treat Holder

Hello everyone!  Welcome to my first project for Gina's Designs.
What I have created today is an Easter card and treat holder.


First is my card. I used several pieces from the Easter build a layout.  I used the basket, the small eggs and one of the bunnies.  I painted the bunny with gesso then added snowtex to make it look like fur.  I added one of the small bows to the bunny, which I inked with distress ink and used glossy accents on it.  I added paper to the small eggs and the basket.  I added twine to the basket handle.  I also added some trim, seam binding and flowers all from my stash.  I also added some metal letters and a word bead which says "Easter Love".  I inked all the papers and the embellishments with distress ink.


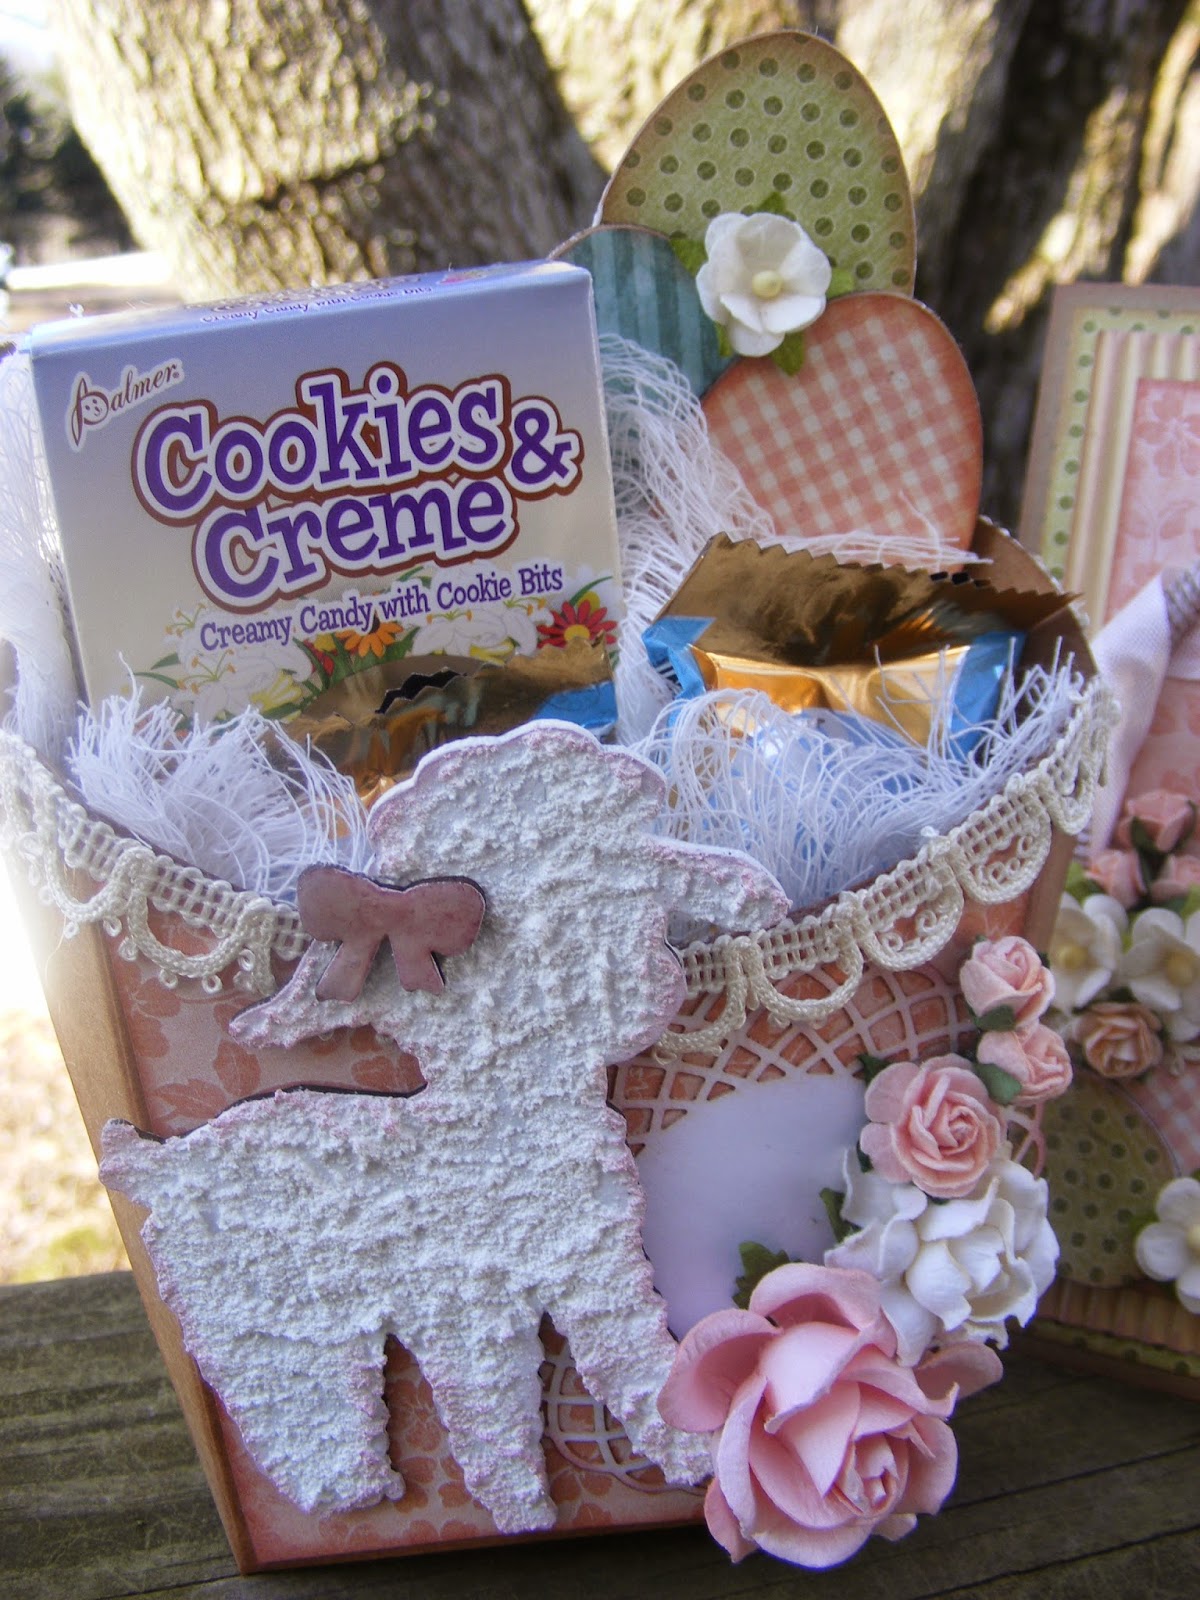
My treat holder is an altered fry box.  I added the large eggs and the lamb from the same collection.  I also added a doily from the "Cardstock doily set 1".  I used  the same technique on the lamb as I used on the bunny.  I also added trim and flowers from my stash.  I inked all the papers and the doily with distress inks.


Gina's Designs items used:


Other items used:
Graphic 45 Paper
Wild Orchid Craft Flowers
Fry Box
SnowTex
Glossy Accents
Trim
Seam Binding
Metal Letters
Word Bead
Distress Inks; Vintage Photo and Victorian Velvet
Gesso
Cardstock/Corrugated Cardstock

I hope you have enjoyed my first project.
Thanks for stopping in and check back often!
Kim :)